Hey everyone! I hope yall are having a great beginning to your weekend. Last month, through Foodbuzz I received the opportunity to try Godiva coffee. Not only did the flavors smell and taste like they were described, but went wonderful with desserts. Here's my recipe for Mocha Chocolate Chip Parfait!
Serves 8 people Prep Time 20 minutes Inactive Prep Time 30 minutes
Ingredients
Gluten Free Chocolate Chip Cookies of your preference
1 4.5 oz box of chocolate pudding mix
1.5 cups of milk
.5 cup room temperature brewed Godiva Caramel Pecan Bark coffee
Whipped Cream
Steps
In a medium saucepan, stir the mix, milk, and coffee over medium heat. Once the pudding starts to boil, stir constantly for one minute, and then remove it from heat. Let it sit for 5 minutes, then stir it constantly for another 5 in order to cool it down. It is ready for the next step once room temperature.
In high ball shot glasses or some other dessert presentation, crumble the cookies into the glasses until there is a 1/4 inch layer of cookie on the bottom.
Pipe the pudding into each glass until halfway full.
Add a dollop of whipped cream, then add another layer of cookie. Fill to the top with chocolate pudding.
When ready to serve, garnish with additional whipped cream. I hope you enjoy!
As part of the Foodbuzz Tastemaker Program, I received Godiva Pumpkin Spice and Caramel Pecan Bark coffee.
It is time once again for the Gluten Free Ratio Rally! This month Kate from Gluten Free Gobsmacked hosted the event this month, and our assignment was WHITE OR YELLOW CAKE! Yum.
Perhaps the greatest thing I love about the gfreerally (other than the really tasty food that everyone creates) is the access to the knowledge of other food bloggers. I love the ability to work with everyone in researching the proper ratios and what actually makes a traditional white or yellow cake.
For this Ratio Rally Recipe, I use a ratio of:
flour : egg : sugar : fat
1 : 1 : 1 : 1
Out of this opportunity, I learned of a completely new way of preparing a cake batter to produce a buttery, tender yellow cake. The nice thing with the texture of this cake was that I was easily able to separate it into a layered cake with minimal cracking or breakage.
The main reason I was excited for the white/yellow cake challenge is that growing up my mom had a small business of sort building and decorating cakes. It was part of what got me interested in cooking, and I'm excited to share this sophisticated cake. Feel free to exclude the rum in order to serve without any alcohol.
Cake
227g eggs (4-5 large eggs)
227g white sugar
1 tsp lemon juice
2 tsp vanilla extract
2 tsp baking powder
85g white rice flour
57g potato starch
28g tapioca starch
28g almond flour
28g brown rice flour
227g melted butter
Syrup
1/6 cup strong coffee, chilled
1 tsp rum
Frosting
5 egg yolks
1 cup sugar
1 cup mascarpone
1 1/2 cup heavy cream
Dark Chocolate for garnish
Steps Preheat the oven to 350F. Line the bottom of an 8" round cake pan with parchment paper, and grease the bottom and sides of the pan. In a small bowl, combine all the flours.
Fill a shallow dish with warm water, and place an empty medium-sized mixing bowl into the dish. Add the eggs, sugar, lemon, and vanilla, beat for about a minute. Remove the eggs from the water and beat them until they have tripled in volume, which took me about 5 minutes.
Gradually fold the flour into the batter until fully combined. Pour the batter into the pan, and bake for 40 minutes, or until an inserted toothpick comes out clean. Once the cake is baked, remove from the oven and let cool completely. Once the cake is completely cool, run a knife along the edge of the pan and invert into a cooling rack.
While the cake cools, mix together the coffee and rum in a cup. To make the frosting, start a double boiler, and add the egg yolks and sugar. Cook over high heat until the sugar is dissolved, stirring constantly. Once sugar has dissolved, reduce to low heat and continuously whisk for 10 minutes.
After the 10 minutes, remove the custard from the heat and whisk until it has thickened a bit, approximately 1 minute. Fold in the mascarpone until combined. Whip the cream in a chilled bowl until peaks form, and gently fold into the custard until well combined. Refrigerate the frosting until you are ready to frost.
Once the cake is chilled, cut the cake in half so that there are two circle cakes. I have two techniques to recommend for this.
1. If you are scared of dividing the cake, take a long sewing string, and wrap it around the cake. Gently tug the string until it cuts through the cake and splits it.
2. If you feel a little brave, use a really long, sharp knife to divide the cake in half. Be sure to cut slowly for your safety, and in order to allow you time to make the perfect cut.
Once the cake is divided, carefully place the bottom piece onto a plate. I normally use two large knives to get leverage in between the cake layers. It also never hurts to have a friend lend you some hands in order to safely transport the cake.
Using a pastry brush, brush the coffee onto the cakes, and drench them in the coffee. Let the cakes stand for a few minutes to soak in the coffee.
Now, its time to ASSEMBLE THE CAKE!
Mmmmmm creamy goodness. Favorite frosting ever.
Take a nice, large dollup of frosting and place on top of the bottom layer, and spread smooth. Place the top layer on top, and then secure the layers with toothpicks. I like doing this to prevent the cake from sliding everywhere when you frost it.
Frost the top of the cake, followed by the sides. After I frost the sides, I like to run the knife across the side of the cake for an uniform side at the end. If the frosting starts to melt (especially during the summer), place the cake in the fridge for a few minutes to firm up. Once the frosting is complete, use a potato peeler to shave chocolate on top of the cake.
I hope you enjoy this recipe! Be sure to check out the other Gluten Free Ratio Rally Recipes!
First off, Happy Valentine's Day everyone! Last week I traveled down to Florida for work. As I was there, I probably went to 3 or 4 restaurants that served Red Velvet Cake for dessert. For those who don't know, Red Velvet is a cocoa based cake that gets its color from food dye and the reaction of combining vinegar, buttemilk, and cocoa. I used this whipped cream cheese frosting recipe to frost my cupcakes. I prefer this frosting for red velvet because it has the tang of the cream cheese, but the light airy texture you get from whipping cream. I like to deviate from traditional red velvet cake recipes, and add some cinnamon for subtleness, and some fresh coffee to bring out the rich cocoa flavors. I hope you enjoy!
Prep Time: 10 minutes Difficulty: Easy Bake Time: 16 minutes per muffin tray Yields: About 18 cupcakes
Dry Ingredients
3/4 cup white rice flour
1/2 cup brown rice flour
1/2 cup tapioca flour
3/4 cup potato starch
1 tsp xantham gum
1 1/2 cup granulated sugar
1 tsp baking soda
1 tsp salt
2 tsp cocoa powder
1/2 tsp cinnamon
Wet Ingredients
1 1/2 cup canola oil
1 cup buttermilk
2 eggs
1 1/2 tsp fresh coffee, room temperature
1 1/2 tbsp red food coloring
1 tsp white vinegar
1 1/2 tsp vanilla
Steps
1. Preheat oven to 350F. Line muffin trays with paper cupcake cups.
2. In a medium bowl, mix all the dry ingredients. In a large bowl, whisk together all the wet ingredients.
3. Slowly whisk the dry ingredients into the wet. This ensures a smooth, silky batter.
4. Spoon the batter into the cupcake tins, 2/3 full. Place into the oven and bake for 16 minutes, or until inserted toothpick comes out clean. Let the cupcakes cool completely.
Flashback to a year ago, when the greater Washington D.C. area saw the worst snowstorm its had in years; people dubbed it the only thing logical. The snowpocalypse. D.C. and its surrounding cities experienced upwards of 2 feet of snow that shut the metro area down. It was such a big deal that whenever I enter the word "snow" into my phone it now decides to auto-fill with snowpocalypse.
Why is something a year ago relevant today you may ask? Aside from the fact that D.C. experienced another snow storm this past week that turned rush hour commutes into 8 to 10 hour events rather than the normal .5 to 1 hour routines, the weekend of last year's snowpocalypse was supposed to be my roommate Zak's birthday party. Sadly, due to people's inability to travel he had to cancel his birthday party. A year later, I came across the opportunity to participate in the January Foodbuzz 24x24, a 24 hour dinner party hosted by 24 different individuals across the world. Needless to say I was ecstatic when I learned that I could participate in this event, and celebrate my roommates birthday with our closest friends. So welcome to my first Foodbuzz 24x24 post!
When Breakfast meets Dinner...
That's where we come to Brinner and a Book. A few months ago, while out in D.C. with friends, one of my friends vocalized the idea of spending the day relaxing with friends while wearing pajamas, drinking wine, and reading books under the warmth of blankets. I then mentioned the idea of adding brinner to the event, which is having a breakfast meal for dinner. Needless to say, we decided right then and there to have a relaxing, book reading, food eating birthday for Zak on the last weekend of January.
We all gathered together on Saturday afternoon in our PJs at my home in Northern Virginia. Zak loves exploring different types of cheeses, so we started the afternoon catching up on events post New Years with mimosas and assorted cheeses.
After a few mimosas and learning that, even in teams, Trivial Pursuit was none of our strong points (however, I did gain the quite valuable knowledge that Orville Redenbacher died in the bathroom) I decided to go off and start dinner while the others read books and explored their knowledge of Scrabble.
The Food
Breakfast for dinner gave me the opportunity to flex my creativity and turn some classic American breakfast platters into fun dinner items. The other fun twist on this meal was the dietary restriction. I found out last year that I needed to be on a gluten-free diet (which makes the consumption of many traditional breakfast dishes impossible) so I had to come up with gluten-free alternatives for some dishes. Also, I found out that some of our guests were vegetarians, so I made some tweaks to parts of the menu that I will share with you all. So, onto the first dish...
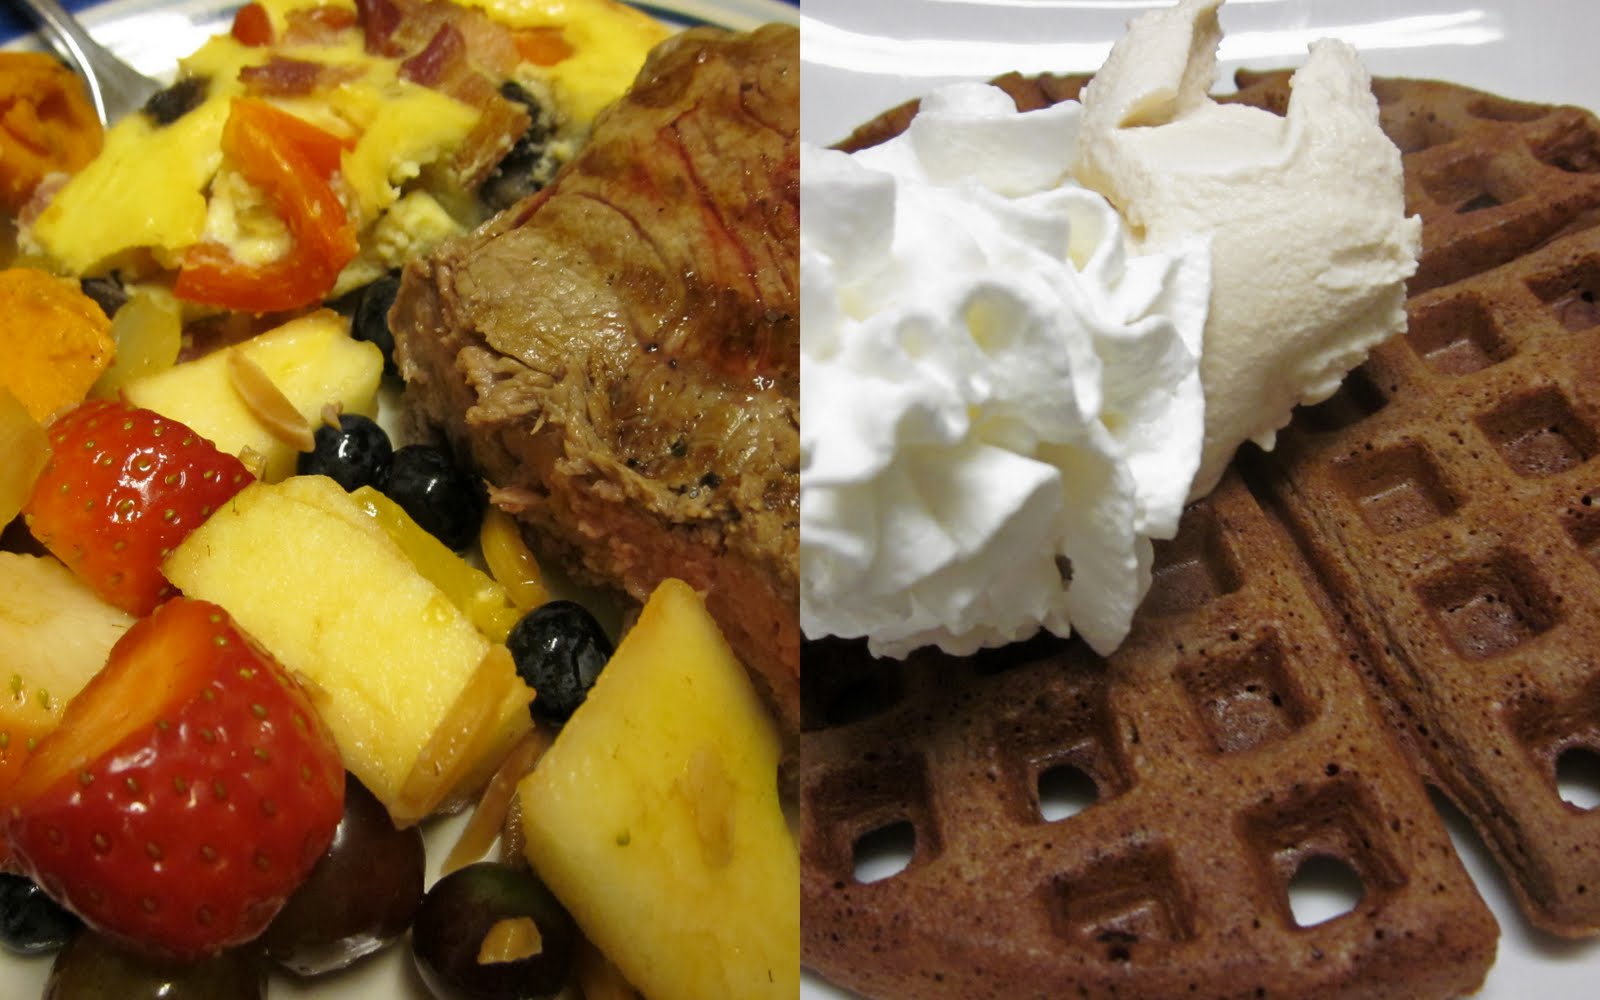
Steak and Eggs: NY Strip Steak and Bacon-Tomato Frittata
The main course of the dinner was a spin on the tradition steak and eggs dish, which became NY Strip Steaks with a side of Bacon-Tomato Frittatas.
How to Cook the Steak
Cooked the steaks using a grill pan over medium heat. Once the pan comes up to heat, spread some olive oil over the pan, and salt and pepper both sides of the steak. Cook the steaks on each side for about 5-6 minutes per side, and cover them with either a lid or a sheet of aluminum foil to capture the heat. Apply pressure with the back of a fork on the tops of the steaks to tell if they are done rather than cutting it open. If you feel quite a bit of resistance when you try to push down the steak, it should be close to done. Remove the steaks from the pan, and cover for about 5 minutes. This lets the juices of the steaks to rest inside the steaks, while cutting a steak open to test for done-ness leaks juices and dries out the steak.
The Frittata
I wanted to make a frittata instead of typical eggs or omelets to have a fun, cultural twist on traditional eggs. A frittata is similar to omelets, but has a few differences. Frittatas normally have the eggs poured into a pan, and then the fillings are added on top. Also, the eggs are not stirred when poured into the pan, allowing a crisp outer layer to the frittata. The link to the detailed recipe is located here. I've included a video below detailing how to make it, including important cooking and safety tips.
Fruit Salad with Balsamic Almonds
I wanted to make a light side dish to counter-balance some of the heavier dishes, so a light fruit salad was the logical choice to me.
Ingredients
-Strawberries
-Blueberries
-Red seedless grapes
-Raspberries
-2 oranges
-1 crisp ted apple
-Juice of half a lemon
-3 tbsp balsamic vinegar
-1 tsp white wine
-1/4 lb sliced almonds
Steps
1. Preheat the oven to 350F. Spread a layer of almonds on a cookie sheet, and lightly salt. Toast the nuts for about 3 minutes. When out of the oven, toss in a tablespoon of the vinegar.
1. Slice the greens off the strawberries, and slice in half. Add to a medium bowl.
2. Peel the orange, and slice into half-pinwheels. Add to the bowl.
3. Core the apple, and slice into pieces the same size as the oranges. Add to the bowl.
4. Add all the other fruits to the bowl.
5. In a small bowl, whisk together the wine, juice, and remaining vinegar. Add the nuts and juice to the bowl, and lightly toss.
Sweet Potato Hash
Another iconic dish to breakfast is hash browns. For dinner, I wanted to use fresh, local sweet potatoes and flavors such as cinnamon and maple to tie in some other breakfast flavors.
Ingredients
-2 to 3 sweet potatoes, diced into 1/2 inch cubes
-1 medium onion, diced
-2 tbsp ginger
-2 cloves garlic, minced
-2 tbsp cinnamon
-1/4 cup maple syrup
-dash salt and pepper
Steps
1. Preheat a deep pan over medium heat. To this add the potatoes, ginger, cinnamon, S&P, and maple syrup. Cover with a lid, and stir occasionally.
2. While the potatoes cook, sautee the garlic and onions in a tbsp of olive oil until the onions are translucent.
3. Add the onions and garlic to the potatoes, and cook for about 20-30 minutes, stirring constantly, or until a fork inserted to the potatoes goes through.
All together on one plate...
When cooking all of the above, I found out that some of our guests were vegetarian, so I made one or two alterations, such as cooking an additional frittata without the bacon. The entire meal was a huge success, and everyone loved the main course and sides, especially the frittata and hash.
However, there was one more surprise for everyone. I mean, you can't have a dinner party, nor could you have a breakfast party, without some...
Needless to say that this was the star of the show. For this I used a gluten free flour blend of 1 cup white rice flour, 2/3 cup potato starch, 1/3 tapoica flour, and 1/2 tsp xantham gum. I like this blend because of the flavor and texture. Also, with this I've realized that homemade coffee ice cream is completely and utterly (ha, cow joke. get it?) amazing...
Thank you to everyone for reading, I hope you enjoyed reading this as much as I enjoyed preparing it. Also, thank you again to Foodbuzz for this wonderful opportunity. The recipes for the Steaks, Fruit Salad with Balsamic Almonds, and Sweet Potato Hash are included in this post, while the recipes for the Frittata and Waffle can be found here:
The perfect blend of coffee and chocolate bliss...
Yields about 6-8 Waffles, and 5 cups of ice cream
Waffle Ingredients: -2 cups gluten-free flour mix
-5 tbsp sugar -1/4 cup high quality cocoa powder
-1/2 tsp salt
-1/2 tsp baking soda
-1 tsp baking powder
-3 eggs
-2 tbsp melted butter
-2 tsp vanilla
-2 cups milk
Waffle Steps: 1. Heat a waffle griddle per manufacturer's instructions. 2. In a medium bowl, mix all dry ingredients. 3. Whisk in the eggs, butter, vanilla, and half the milk until well combined. Add the rest of the milk and stir until combined. 4. Once griddle is preheated, add 1/4-1/2 cup batter (depending on the size of your waffle griddle), and cook until done.
Ice Cream Ingredients: -1 cup cold whole milk -3/4 cup sugar -1/4 cup fresh hazelnut coffee, chilled -2 cups heavy cream -2 tsp vanilla
Ice Cream Steps: 1. Whisk together all the ingredients except the cream until the sugar is dissolved. 2. Once dissolved, add in the cream and whisk until combined. 3. Turn on your ice cream machine, and pour in the ingredients. Let the maker mix for about 30 minutes or until done.
Top your warm waffles with ice cream and whipped cream, and enjoy!
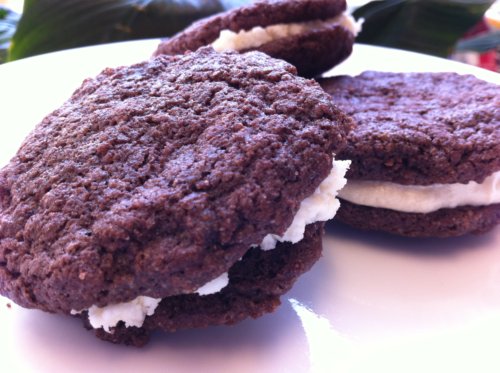
In the days before I was gluten-free, whenever the choice arose between Oreos and Reese's Peanut Butter Cups I would always go for the Oreos (which is a choice I happy don't have to make anymore). A few days ago one of my coworkers got lunch at a fast food restaurant that serves Oreo milkshakes, and needless to say I got the next idea for what I wanted to make gluten-free.
So after searching the internet, I came across this recipe and decided to try and make it gluten free. Also, I got a coffee maker for Christmas, so I wanted to test making a coffee filling for some of the Oreos. After tasting both, I highly recommend the Mocha Oreos vs the Classic, has a much more robust flavor.
Cookie Ingredients
-1/2 cup white rice flour
-1/4 cup brown rice flour
-1/4 cup tapioca flour
-1/4 cup potato flour
-1/2 tsp xantham gum
-1 tbsp corn starch
-1/2 cup cocoa powder (high quality such as Ghiradelli)
-1 tsp baking powder
-1 tsp baking soda
-1 cup sugar
-1 tsp salt
-1/2 cup and 2 tbsp butter, room temp
-2 eggs
Steps
0. Preheat oven to 350F.
1. Mix the flours, gum, cocoa, powder, soda, salt, starches, and sugar in a medium bowl until blended.
2. Cut the butter into small pieces and then blend into the flour.
3. After the butter begins to blend into the flour, add one egg. Mix until dough starts to form. If the dough is very crumbly and does not come together into a dough, add the second egg and blend until a ball forms.
4. Onto baking sheets lined with parchment paper, spoon tablespoons of dough onto the cookie sheets. Wet your fingers with water, and smooth out the dough balls into the shape of Oreo cookies.
5. Place in the oven, and bake for 10 minutes. Cool cookies on a rack until cookies are room temperature.
Filling
-1/4 cup room temperature butter
-1/4 cup shortening
-2 cups powdered sugar
-2 tablespoons vanilla
-2 to 3 tablespoons brewed coffee (4 to 6 tablespoons if you want the entire batch of filling to be coffee flavored)
Steps
1. In a bowl, beat butter, vanilla and shortening until fluffy.
2. Slowly beat sugar into the butter mix. Continue mixing until light and fluffy.
3. If you are making half the batch coffee flavored, split the filling into half.
4. Whisk the coffee into either half or all of the filling, depending upon your preference.
5. Spoon the filling in between each pair of cookies and gently press into a sandwich.