Sunday, January 27, 2013

1 Gluten Free Teriyaki Chicken Wrap

chicken, teriyaki, slaw

I can't believe that it is already getting close to the beginning of February!  To close out January, I wanted to share a gluten free chicken wrap recipe with everyone. When I attended school in Charlottesville before I went gluten free, I loved going to a restaurant called Zazus. They had some of the best wraps I had, including an Asian chicken teriyaki wrap. Their chicken wrap is filled with moist grilled chicken, fresh rice, a zesty Asian slaw and sweet teriyaki sauce. The problem with this wrap is I can't eat it anymore. Between the flour tortilla and teriyaki sauce, it's a gluten nightmare. That's why I wanted to come up with a gluten free variety inspired by it.

Rather than grilling the chicken for this recipe, I wanted to do a different method of cooking. I decided to make poached chicken. Poached chicken is a quick and easy method of cooking chicken, especially for those nervous about under cooking chicken. The main  goal behind poaching is to gently cook food in a simmering liquid. This is normally done for gentle food such as fish and eggs or food such as chicken that dries out easily. For this recipe, I cook the chicken in a broth that is favored with various aromatics. The act of cooking the chicken is as simple as boiling the stock, adding the chicken, and letting it cook in the warm liquid.


Prep Time: 20 minutes
Cook Time: 22 minutes

Ingredients
Poached Chicken
52 oz chicken stock
2 cloves garlic, crushed
1 lemon, sliced
2 handfuls of black peppercorn
1 handful of dried chopped onion
1 bayleaf 
1 pound chicken breast
Asian Slaw
half of one green cabbage, shredded
half of one red cabbage, shredded
4 scallions, chopped
2 tbsp olive oil
1 inch of ginger root, freshly grated
1/4 cup white vinegar
3 tbsp gluten free soy sauce
juice of 1 lemon
salt and pepper
Wrap
gluten free tortillas
2 cups cooked rice
gluten free teriyaki sauce


Steps

Add the stock, garlic, lemon, pepper, onion, and bayleaf to a pot. Bring the liquid to a boil, and add the chicken. Bring the poaching liquid back to a boil, and cook for 3 minutes. Remove the pot from the heat and cover. Wait 9 minutes, then flip the chicken and cover again. Wait 9 minutes and then remove the chicken from the poaching liquid.

To make the slaw, add the cabbage and scallions to a large bowl. In a small bowl, mix the remaining of the slaw ingredients together. Pour the dressing over the cabbage mix, and toss until coated.

To assemble the wrap, chop the chicken into bite size pieces. For each wrap you want to make, wrap the tortillas in a damp paper towel and microwave for 10 seconds to soften them.

For each wrap, add several spoonfuls of rice, slaw, and chicken. Drizzle teriyaki sauce over top. Fold the short ends of the tortilla in, and tightly wrap the tortilla into a wrap. Cut in half and serve.

Tuesday, January 22, 2013

0 GF Community Passionate for Pinterest

For those of you not familiar with Pinterest, check out http://pinterest.com.


Let me give you a brief tutorial on the fastest growing social media platform.  I must start off confessing that I am somewhat of a "newbie" when it comes to Pinterest.  I do however, have a keen interest in Pinterest and recently changed my personal Pinterest profile to a business profile for my own gluten-free business.

With my new obsession comes a variety of Pinterest reading and this is just a bit of what I have discovered.  Pinterest is a very user friendly online pinboard that allows users to create collections of images from across the web.   These images are "pinned" onto "boards" based on categories such as fashion, holidays, arts & crafts, recipes and more.  Each "pin" is a link or picture that you want to remember or share with your friends. The cool thing is Pinterest allows you to easily browse others' boards to "pin" the images or ideas that you like.

Pinterest's "search" feature allows you to search for just about anything your heart desires--such as recipes. Yes, recipes! All kinds of creative recipes paired with images of the culinary artwork! This is like having dozens of your favorite cooking magazines in one easy to use social media platform. Once you are on the home page for Pinterest find the "search" box and type in gluten-free.  Dozens of gorgeous GF images will fill your screen.  This is a GF lover’s dream!  If you are new to a GF diet life could not get any better.  Now I have been in the GF world for over 10 years and the passion that I have experienced from the GF community is second to none.  Once there is a great GF product or recipe the word spreads like wildfire.  Pinterest now makes this a virtual explosion of amazing GF content.  Scroll up and down on your screen & you will find not just recipes but, a "gluten-free safe list", "Gluten-free conversion chart", GF cookbooks, a comparison chart for the cost of GF!.  Once you find an image that is calling your name just tap on the image to either "re-pin", "like" or "comment on".  If you would like the recipe then just tap on the screen 2-3 times until you are transported to the original source of the image.  It is that easy!

Check out my Pinterest page at http://pinterest.com/juliereinstein/   I am constantly trying to add and curate my boards which makes Pinterest so much fun. Let me know what you think.-follow me & I will follow you back!

 Jessica @ Gluten-Free Goodness has a fabulous Pinterest page: http://pinterest.com/jessicalenae/gluten-free-goodness/
 Jessica does an amazing job of "pinning" an eclectic mix of recipes.

So, please if you have tried a great GF pasta recipe or bread or anything GF spread the word via Pinterest.  We would love to hear your comments!


Sunday, January 20, 2013

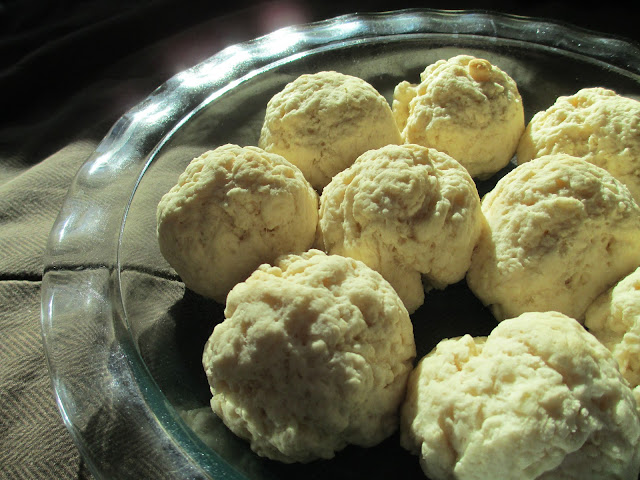
0 Gluten Free Dinner Rolls

gluten free, dinner rolls


Hey everyone, I hope you're all staying warm in this winter season! Over the past month or so, I've been trying gluten free bread recipes. For a while, I had completely avoided making gluten free breads and rolls. The first reason is that I really don't crave bread that much anymore. Eating gluten free, especially for those motivated by food sensitivities, isn't a diet change; it's a complete lifestyle change. For me, part of that lifestyle change was cutting out breads and after a while, it didn't really matter much to me.

Another reason that avoided making gluten free breads is I was never happy with the results. I’m a slight perfectionist, so when a recipe doesn’t come out the way I envision it enough times, I shelf it for a while. Aside from my one successful white bread recipe (check it out here), most of my breads turned out pale, heavy, or too grainy. In the past few months, after seeing various roll recipes, I was inspired to try again, and here is my latest attempt at making gluten free rolls. They have a fairly good consistency and are not heavy. The recipe is in grams because I ended up being able to use one bowl for the entire recipe. Hooray for food scales!

Active Prep Time: 20 minutes
Inactive Prep Time: 40 minutes
Baking Time: 25 minutes

Ingredients
56 grams warm water
226 grams warm milk
1 1/2 tbsp butter, room temperature
1 tbsp honey
2 tsp salt
1 1/4 tbsp yeast
120 g sweet rice flour
100 g tapioca flour
120 g potato starch
2 tsp xantham gum

Steps
In a large bowl, combine the water, milk, butter, honey, salt, and yeast. Let it sit at room temperature for about 8 minutes.

After the 8 minutes, stir in the flours, starch and gum. Stir constantly until a dough forms and is slightly sticky when touched. Cover the dough with a damp towel and set aside for 20 minutes.

Uncover the dough, and lightly grease your hands with oil. Separate the dough into half. Form 5 balls out of each half, and place into a greased round pan. Once all the balls are formed, cover the pan with a damp towel for another 20 minutes.

Preheat the oven to 350F. After the balls have risen again, bake for 25 minutes and then remove them from the oven.

Sunday, January 13, 2013

15 Gluten Free Orange Rolls - #SundaySupper First Birthday


Today marks the first anniversary of the #SundaySupper events! I joined back in July, and have loved each event I have participated in. To celebrate the success this group has had for a year, we are each making someone else's recipe from a previous Sunday Supper. This was an insanely difficult choice, as each week we collectively share over 20 different recipes! So how does one select a single recipe from all of these choices? A few weeks ago I posted a cinnamon roll recipe, and I've been wanting to make gluten free orange rolls. Liz of That Skinny Chick can bake shared an orange roll recipe for the week we promoted Hurricane Sandy relief, and I wanted to make a gluten free variety of that.

I made two notable changes to the original recipe. I changed the flour to a gluten free flour blend of sweet rice flour, brown rice flour, tapioca flour, and potato starch. I also added mascarpone cheese to the frosting mix to add a slight tang to the frosting.

Thank you to Liz for all of her hard work with the group! Check out the full list of hosts after my recipe adaptation!

Prep Time: 20 minutes
Inactive Time: 2 hours
Bake Time: 25 minutes

Ingredients

Sweet Dough Ingredients
2 1/4 tsp active dry yeast
1/2 cup warm water
1/2 cup warm milk
1/3 cup sugar
1/3 cup butter, room temperature
1 egg
1 3/4 cup sweet rice flour
1/2 cup brown rice flour
1/2 cup potato starch
3/4 cup tapioca flour
1 3/4 tsp xantham gum
Filling Ingredients
1 cup powdered sugar
2 tbsp butter, room temperature
zest of 2 oranges
juice from 1 orange
Frosting Ingredients
1 cup powdered sugar
2 tbsp butter, room temperature
2 tbsp mascarpone cheese
zest of 1 orange
juice from 1 half of an orange


StepsIn a large bowl, dissolve the yeast in warm water for 5 minutes. In a medium bowl, mix the flours, starch, and gum together. Stir milk, sugar, butter, salt, egg and 2 cups flour blend into the large bowl of yeast water, and mix until smooth. Add about 1 1/2 cups more flour and beat until a dough forms. Place the dough in a greased bowl, then flip over. Cover and let rise in warm place till doubled in size, about 1 1/2 hours. Make filling while dough rises.

To make filling, beat all ingredients till creamy. Set aside.

Remove half of the dough and roll into a 12 x 7 inch rectangle on lightly floured surface. Spread with half the orange filling. Roll up the dough tightly, beginning at the wider side. Pinch to seal seam and adjust roll to make even, and cut roll into 1 inch slices. Place into a greased 8 inch round pan. Repeat with the other half of the dough. Cover and let rise till doubled, about 40 minutes.

Preheat the oven to 375º. Bake till golden, about 20-25 minutes. To make the frosting, beat all the ingredients together. Frost while warm.


Thank you to all of the other hosts!


Sunday Supper Appetizers:
 Sunday Supper Soups:
 Sunday Supper Main Dishes: 
Sunday Supper Veggies: 
SundaySupper Desserts and Snacks: 
 Sunday Supper Breakfast Faves:
Sunday Supper Wine Pairings by ENOFYLZ Wine Blog 
Join us this evening on twitter at 7pm EST for our #SundaySupper conversation! Just search for the SundaySupper hashtag!

Sunday, January 6, 2013

0 #Leeklove Bloghop


Hi everyone! It's the first weekend of the month and time for our #Foodlove blog hop! For those who haven't heard of it, every month a group of bloggers come together to post recipes set to a theme we decide ahead of time. We then launch a month of themed recipes with posts we host the first weekend of the month. This month, our theme is leek, so be sure to check #leeklove on Twitter and Google+ for all of the great recipes! If you'd like to participate, contact me through the Contact page on my blog, or on Twitter, Facebook, or Google+!
This month, our hosts for #Leeklove:
Susan | Girl in the Little Red Kitchen | @littleredkitchn
Deanna | Teaspoon of Spice | @tspcurry
T.R. | No One Likes Crumbley Cookies| @TRCrumbley

Check out my Leek and Pork Gluten Free Ravioli recipe here!

26 #SundaySupper: Gluten Free Leek Ravioli


I've had several attempts at making gluten free pasta in the past, but I haven’t been fully satisfied with the result most of the time. Either they've fallen apart, or they've come out too grainy. It’s been a goal of mine to create a recipe that not only I can enjoy, but anyone else could as well. That’s why this week’s #SundaySupper theme fitted so well, trying to achieve something on your proverbial bucket list.

I deemed this ravioli recipe a success, the dough didn't fall apart at all in the water, and did a very good job of holding the filling (which let’s admit, is the best part of ravioli).

I played around with the ratios of starch a bit, and I think I've come out with a non-grainy, tasty ravioli dough. For the filling, I used a leek and pork filling, inspired by my Foodlove’s Blog Hop theme of the month: leeks. It’s super tasty, and goes great with anything as simple as a pesto or a light sauce. To learn more about foodlove, check out this link for all of the #leeklove hosts and information on how to participate!

Join us today at 7pm EST on Twitter as we share our bucket list recipes during #SundaySupper chat. Here are all of this week’s recipes, and you can find mine at the bottom of the page!

Sunday Supper Specialty Breads:
Sunday Supper Main Dishes:
Sunday Supper Desserts and Snacks:

Gluten Free Leek Ravioli

Prep Time: 30 minutes
Cook Time: 15 minutes

Ingredients
Pasta Ingredients
1 1/4 cup sweet rice flour
1/4 cup potato starch
1/2 cup tapioca flour
1 tsp xantham gum
5 eggs, room temperature
a dash of salt and pepper
Filling Ingredients
1/2 lb ground pork
1 leek, chopped
3 cloves garlic, minced
1/4 tsp oregano
1/4 tsp parsley
1/3 cup ricotta cheese
3 tbsp parmesan cheese
1 tsp basil pesto
salt and pepper for seasoning

2 egg yolks for pasta glue

Steps
To prepare the filling, cook the pork on a sautee pan at medium heat until it is not longer pink. While the pork is cooking, add a dash of salt and pepper for seasoning. Drain the meat, and transfer it to a medium sized bowl. Add the 1 tbsp of olive oil, leek and garlic to the sautee pan. Season with another dash of salt and pepper, and cook until the leeks are tender, about 5 minutes. Once the leeks are cooked, add them to the meat. Stir in the herbs, pesto, and cheeses until everything is well blended. Set the filling aside.

In a medium bowl, mix together the flours, starch, gum, and salt and pepper. Stir in the egg one by one, until a dough forms and the egg is mixed thoroughly throughout the dough. Divide the dough in half, and heavily dust a rolling pin and board with tapioca flour. Roll out the first half of the dough until it is about 1/4 inch thick. Cut the dough into 2 inch squares. Repeat with the second half of the dough.

To assemble the ravioli, whisk the two egg yolks in a bowl. Take one of the ravioli squares and place a spoonful of filling on the dough. Brush the outsides of the dough with the egg. Take a clean ravioli square and stretch it out a bit with your hands. You want it to be large enough to easily cover the filling and the bottom square. Use your fingers to seal of the edges around the two ravioli squares. Continue with all of the squares until all of the squares have been transformed into ravioli dough.

Fill a large pot with water, 2 tbsp olive oil, and 2 tbsp salt. Boil the water on the stove top. Once it is boiling, add the ravioli to the pot, with only 3 ravioli at a time in the pot. Once the raviolis float to the top with ease, then you know the pasta is cooked and ready to remove. Expect about 2 minutes for each piece to fully cook. Serve the pasta with the basil pesto and Parmesan cheese and enjoy!