Showing posts with label Chocolate. Show all posts

Sunday, April 14, 2013

15 #SundaySupper - Gluten Free Chocolate Chip Cookie Pie


It's Sunday again, and time for another #SundaySupper! This weekend we decided to take all of our mutual love for movies and food and marry the two together. All of our recipes this week are inspired by the movies. There has been a huge volume of creativity over the past week from all of the participants, and it's been fun to see all the recipes people have come up with. 

I was inspired this week by Life of Pi...and a well know pair Amy Poehler and Tina Fey. Life of Pi is a beautiful film released last year, with amazing storytelling and remarkable visuals. How do Fey and Poehler play into this? During their opening monologue they made a pun regarding Life of Pi and eating pie...the video of their monologue is down below:


I made a gluten free cookie crust, and filled it with a chocolate custard cream. Super tasty, and sooo tasty! 

Be sure to check out everyone's movie inspired recipes below!


Toast (bready things)
No Reservations (soups and salads)
Today's Special (fish, chicken, beef, and pork)
Forks Over Knives (veggie-heavy dishes and sides)
Udon (pasta and noodles)
Just Desserts (sweet treats)
Bottle Shock (beverages)

Join the #SundaySupper conversation on twitter on Sunday, April 14th to talk all about movies that have inspired us to head into the kitchen - and the food that comes from that inspiration (7pm EST)!  We’ll tweet throughout the day and share recipes from all over the world.   Follow the#SundaySupper hashtag, and include it in your tweets to join in the chat. Check out our #SundaySupper Pinterest board for more delicious recipes and food photos.

Serves: 8
Prep Time: 20 minutes for the crust, 30 minutes for the pie filling
Bake Time: 24 minutes for the crust
Cook Time: 5 minutes for the filling

Crust Ingredients:
1 cup butter, room temperature
3/4 cup white sugar
3/4 cup brown sugar
1 egg
1/2 tsp vanilla
2 1/4 cup gluten free flour blend
1/2 tsp xantham gum
1 tsp baking soda

Crust Steps:
Preheat the oven to 350F.

In a medium bowl, whip the butter and sugars together until well blended. Add the egg and vanilla and whip until incorporated. Stir in the flour, gum, and soda until well combined. Transfer 3/4 of the dough to a pie tin, and form into the shape of a pie crust (You can use the remainder of the dough for cookies). Take a piece of aluminum foil and cover the crust. Place in the oven and set a time for 15 minutes. After 15 minutes, remove the foil from the crust, and bake for another 10 minutes. Remove from the oven and let cool completely.

Filling Ingredients:
4 eggs
1/2 cup sugar
2 tbsp coffee
10 tbsp butter room temperature
1/4 cup sugar
3 oz 70% bittersweet chocolate, melted
1 tsp vanilla
whipped cream and mini chocolate chips for topping

Filling Steps:
In a double boiler, whisk the eggs, 1/2 c sugar, and coffee non-stop for 5 minutes until foamy and thick. Remove from heat and transfer to a separate bowl to cool down the eggs.

In a large bowl, whip the butter and 1/4 c sugar until fluffed. Stir in the vanilla and chocolate until well blended. Whip in the eggs for 5 minutes until fluffy. Pour into the crust and cover. Refrigerate for 2 hours or overnight. Serve with whipped cream and mini chocolate chips.

Wednesday, February 13, 2013

1 Ratio Rally: Gluten Free Chocolate Souffle


Hey everybody, it's been a relatively intense couple weeks for me, so I'm glad to be bringing a Ratio Rally to you all with a recipe suited for Valentine's Day this week! Souffles can be very intimidating things to bake, but aren't all too hard. Here's my three main tips:

1. Do not open the oven before the souffle is ready. Otherwise it won't be able to rise and achieve the desired form.
2. Serve them immediately. The longer you wait to serve a souffle, the more it will deflate. Take my image in point. It took me a little too long to set up the lighting and camera that my souffle deflated in that period of time.
3. Be careful with incorporating the egg white. If you over fold it, the souffle won't take the form you want. Be gentle and loving to your souffle!
My ratio that I used for this rally is:
1:1:3:3
Milk : Sugar : Egg : Chocolate


As you can see from the ratio, my recipe is flourless. This is one variation of souffle, look to our other participants for a flour variety of souffle! Thank you to everyone who participated this week! Check out their recipes!

Morri | Meals with Morri | Pepperoni Pizza Souffle
Heather | Discovering the Extraordinary | Mini Artichoke-Spinach-Parmesan Souffles

Pete Bronski | No Gluten, No Problem | Amaretto Souffle

Recipe

Prep Time 15 minutes
Bake Time 30 minutes


Ingredients
Room temperature butter
granulated sugar
60g milk
180g dark chocolate, chopped
1 1/2 tsp vanilla
3 egg yolks
4 egg whites
1/4 tsp cream of tartar
60g sugar
zest of one orange

Steps

Preheat the oven to 350F. Grease the insides of ramekins and dust the insides with sugar. Cover a baking sheet with aluminum foil and place the ramekins on top. Set aside.

In a microwave safe bowl, add the milk, chocolate, and vanilla. Microwave the chocolate at 30 second intervals, stirring in between until completely melted.

In another bowl, whisk the egg yolks. Add a spoonful of the chocolate to the egg yolks, and whisk until combined. This will temper the eggs and bring them to temperature. Add the rest of the chocolate to the egg yolks and whisk until combined. Set aside.

In a clean bowl, beat the egg whites and cream of tartar for 2 minutes. Add the sugar, and beat for an additional 2 minutes or until soft peaks form. Gently fold the whites into the chocolate, and distribute into each ramekin. 

Bake at 350F for 30 minutes, and do not open the oven until they are done. Serve immediately.

Sunday, August 19, 2012

7 Devilish Gluten Free Chocolate Cake

gluten free, chocolate, cake

This past weekend I decided to make a dense, rich chocolate cake inspired by Devil's Food Cake. It's made with a blend of flours and cocoa powder, then topped with a simple whipped chocolate cream. Please enjoy!

This recipe will make a standard single layer 9" cake, or 4 smaller 3" cakes. I prefer making smaller cakes because not only is it easier to control proportions that you eat, but gluten free tends to bake better in smaller containers.
gluten free, cake, dark chocolate

Prep Time: 30 minutes
Inactive Prep Time: 1 hour
Bake Time: 35 minutes

Ingredients
112g sweet rice flour
56g tapioca flour
56g potato starch
3/4 tsp baking soda
3/8 tsp baking powder
6 tbsp butter
240g white sugar
87g cocoa powder
1 1/2 tsp vanilla
2 eggs
5/8 c water
1/8 c milk

2 cups whipping cream
4 oz 70% dark chocolate
1/4 cup granulated sugar

Steps
Preheat the oven to 350F. Grease a springform pan on the sides and bottom.

In a medium bowl, whisk together the flours, starch, soda, and powder. Set aside.

In a large mixing bowl, whip the butter until creamy. Add the sugar and mix until blended, about a minute or two. Mix in the cocoa and vanilla until combined, and then whip in the two eggs. Slowly blend the flour into the wet mix, scraping the bowl about half way through.

Add the water and milk to the mix, and stir until well combined. Pour the batter into the pans, and bake in the oven for about 35 minutes. The cake will be ready to remove once a toothpick comes out clean. Invert the cakes and let them cool completely.

While the cakes cool, melt the chocolate with the cream and sugar over medium low heat, stirring constantly. Once the chocolate is completely melted, remove from the heat, and transfer to a medium bowl. Place it in the refrigerator for an hour to cool.

Once the chocolate cream is cooled, using a motorized whisk to whip the cream until soft peaks are formed.

Transfer the cakes to a plate, and frost with the whipped cream. Enjoy!

Sunday, June 24, 2012

8 Gluten Free Cookies and Cream Ice Cream

Hey everyone, hope you're having an enjoyable weekend! One of my college friends is in town this weekend, so we've been having fun exploring museums and the beautiful D.C. weather. Halfway through the day, we decided we wanted ice cream, and we both agreed on cookies and cream. To make it gluten free, I recommend using a gluten free vanilla extract, and gluten free chocolate sandwich cookies. I've had the best result using Glutino brand chocolate sandwich cookies. The texture is able to hold up well when mixed into ice cream. Enjoy!

Prep Time:
10 minutes active,
2 hours 30 minutes inactive
Servings: About 6 1/2 cup servings


Ingredients:
1 cup 2% milk, chilled 
3/4 cup granulated sugar 
2 tbsp vanilla extract 
2 cups heavy cream, chilled 
6 Glutino chocolate sandwich cookies, crushed.
(Additional cookies for garnish or making sandwiches)


Steps
In a medium bowl, whisk the milk, sugar, and vanilla for about 2 minutes, or until sugar has mostly dissolved.

Whisk in the cream until combined, then pour into the ice cream maker. Let it run for about 25 minutes, or until ice cream is creamy and about 5 minutes away from being completely frozen or set. Add the cookies to the ice cream, and let churn for an additional 5 minutes.

Transfer the ice cream to an airtight container, and place in the freezer for about 2 hours. At the end of the two hours, the ice cream will be ready to serve.

Garnish the top with additionally broken cookies. Alternatively, remove the filling from the center of a sandwich, and replace with ice cream for miniature ice cream sandwiches. 

Sunday, June 10, 2012

6 Gluten Free Dark Chocolate Orange Ice Cream

gluten free, chocolate, orange

Hey everyone! Yesterday some of my friends and I wanted to make some fresh ice cream, so here's the recipe we came up with! It's a creamy, smooth dark chocolate ice cream that's infused with orange zest. I don't know quite what it is, but the combination of dark chocolate and citrus is such a euphoric, blissful flavor marriage that one spoonful makes all your troubles just melt away into the comfortable warmth of summer. Yum. This recipe's added bonus is that most ice creams have to ripen (freeze for an additional 2 hours after churning) in order to achieve a smooth texture that doesn't melt in 2 second flat. This recipe was able to stay chilled at a good texture immediately after churning.

Inactive Prep Time: 30 minutes to chill, optional 2 hours to ripen
Active Prep Time: 10 minutes
Churn Time: 30 minutes

Ingredients:
1 cup 2% milk
6 oz 100% dark chocolate
1/2 cup sugar
1 pint chilled heavy cream
zest of 2 oranges

Steps
Over medium low heat, warm the milk in a saucepan. Break the chocolate into pieces, and add with the sugar into the milk. Continue stirring chocolate, sugar, and milk over medium low heat until the chocolate is completely melted. Transfer to a small bowl, and refrigerate for 30 minutes, stirring occasionally.

Add the heavy cream to a large bowl, and whisk in the chocolate milk. Add the zest and whisk until combined. Add to the ice cream maker, and churn for about 20-30 minutes, until the ice cream is smooth and creamy.

Serve immediately, or store in an airtight container for 2 hours in the freezer before serving.

Wednesday, April 4, 2012

15 Gluten Free Berry Fudge Brownies


Brownies are one of those sweet treats that can satisfy almost anyone, yet one where people can be surprisingly opinionated:

"Can I have a corner piece? I love the corner pieces."
"I only eat the middle.  Edge pieces? Gross."
"Why don't these have frosting? Do you have any frosting that I can put on these?"
"Baked? No thanks. Let me know once the batter ready though, I claim the leftovers in the bowl."

These are all differing opinions that I've heard from friends and family alike. Here's my interpretation (and preference) on a chocolate-y dessert stable: brownies. And its all for the gluten free ratio rally this month.

The Ratio
2 : 3 : 3 : 6 : 2
chocolate : egg : butter : sugar : flour

Gisslen's baker's ratio for brownies are listed above. For this recipe, fresh strawberries are added to the batter, which adds a nice little pop of fresh fruit flavor to each bite, and the almonds provide great texture. Also, if you do the math for my recipe, I go a little lower than 6 on the sugar for this recipe. I prefer the taste of darker chocolate, and there's inherently some sweetness added from the strawberries. All of this together provides a great springtime twist on a dessert classic.

Thank you to Mary of Franny Cakes for hosting the ratio rally this month. Please visit her host page at:  http://frannycakes.com/recipes/ratio-rally-hazelnut-brownies/

Here's a link to all of the participants and all of their recipes:


Adina from Gluten Free Travelette made Chocolate Brownie Pie with Orange Zest
Angela from Angela's Kitchen made Gluten & Dairy Free Cream Egg BrowniesBrooke from B & the boy! made Triple Chocolate BrowniesCaitlin from {Gluten Free} Nom Nom Nom made Peppermint Brownie Bars
Caleigh from Gluten Free[k] made White chocolate and marshmallow browniesCaneel from Mama Me Gluten Free made Triple chocolate brownies
Charissa Luke from Zest Bakery made Slutty gluten-free brownies
Claire from My Gluten Free Home PB&J Brownie Whoopee PiesClaire from This Gluten-Free Life made St. Patty's Day Marshmallow Swirl BrowniesErin from The Sensitive Epicure made Mexican Cocoa Brownies with an Almond & Pepitas Crust
gretchen from kumquat made salted caramel brownies
Heather from Discovering the Extraordinary made Nutmeg Blondies
Irvin from Eat the Love made Blueberry Citrus Marble BrowniesJean from Gluten-Free Doctor Recipes made Blue Ribbon BrowniesJenn Cuisine made Grain free brownies with no-bake ricotta cheesecake creamJonathan from The Canary Files made Vegan Marbled Banana Walnut Brownies
Karen from Cooking Gluten Free! made GF Chewy Crackled Top Brownies with Raspberry Puree
Mary Fran from FrannyCakes made Gluten-Free Hazelnut (Nutella) BrowniesMorri from Meals with Morri made Oaxacan Brownies & Mesquite Cacao Blondies~Mrs. R from Honey From Flinty Rocks made Black Bean S'More Brownies
Pete and Kelli from No Gluten, No Problem made Caramel Mexican Chocolate Mesquite Brownies
Rachel from The Crispy Cook made Co-Co Nut-Nut Blondies
Shauna from Gluten-Free Girl made Gluten-Free BrowniesTara from A Baking Life Mint made Chocolate Flourless Brownies


And read below for mine! Enjoy!

Recipe

Servings: 1 8x8 square pan of brownies
Prep Time: 25 minutes
Cook Time: 35 minutes

Ingredients
73g unsweetened chocolate
113g (1 stick) room temperature butter
113g egg (approximately 3 egg whites, 2 egg yolks)
210g sugar
2 tsp vanilla
17g tapioca flour
24g potato starch
16g white rice flour
14g sweet rice flour
6 large strawberries, rinsed and diced
1/4 cup blanched sliced almonds

Steps


Preheat oven to 350F. Grease the inside and sides of a 8x8 pan. Set aside. In a double boiler melt the chocolate and butter together. Once completely melted, remove the mix from the heat.

While the chocolate cools, stir the egg, sugar, and vanilla together until just combined in a medium bowl. Once combined, add about 1/4 cup of the egg mix into the chocolate, and stir quickly to combine (this brings the eggs up to temperature slowly to not scramble them.). Add the chocolate to the rest of the egg mix. Stir just until combined.

Fold in the flours until just combined. Fold in the strawberries and almonds until combined. Pour the batter into the prepared pan and place in the preheated oven and bake for 35 minutes, or until an inserted toothpick comes out clean.

Serve with dusted powdered sugar and enjoy!

Wednesday, March 14, 2012

0 Gluten Free Oreo Cremes


Hey everyone, here is a quick, easy, and delicious dessert using Glutino sandwich cookies and Jello
pudding. Feel free to substitute the cream with 2% milk. The only change is the dessert will have to set for longer.


Prep Time: 1 hour
Servings: 4 ramekins

Ingredients:
1 container of Glutino Cookies
2 tbsp butter, melted
1 3.4 oz package of vanilla instant pudding
1 pint heavy cream

Steps:
Crush one row of the cookies, with the filling removed. Mix with the butter and evenly press into the 4 ramekins.

Leave 4 cookies aside. Take the rest of the cookies, remove the filling, and crush. Set aside.

In a medium bowl, whisk together the pudding and cream until soft peaks form. Fold in the cookies and evenly distribute in the ramekins. Refrigerate for an hour before serving. Garnish with whipped cream and whole cookies.

Tuesday, March 6, 2012

26 Ratio Rally: Gluten Free Brownie Crepes with Strawberry Sauce


Hey everyone! Its the first Wednesday of the month, and time for the Gluten Free Ratio Rally! This month I had the chance to host, and I was excited to have the theme of Crepes! Back when I went to school in Charlottesville (before going gluten-free), there was this one hole in the wall restaurant that served some of the best crepes I ever had. Because of this, I now associate crepes with college memories of some of my closest friends. That's why I was pleased to come up with a variety of savory and sweet gluten free crepes.
For those who are new to the Gluten Free Ratio Rally, its an initiative that a group of gluten free bloggers started last year. Each month we take a recipe normally made with wheat or other glutenous materials and make it gluten free, based on a simple ratio of weights. If the concept sounds interesting and you would like to join, please contact through my Twitter or contact page. The ratio that I used for my crepes is:

1:2:2
flour : liquid : egg

After some experimentation, I settled on a flour mix of potato and tapioca flours. I found that I had a great texture that didn't easily fall apart. Many other bloggers found great success in buckwheat mixes, so be sure to check all of the recipes. 
The most difficult part for me was the baking of the crepes. I own stainless steel pans, so I tried the following combinations:

Using a smaller 4-5″ pan with vegetable oil or butter
Using a 8″ pan with vegetable oil or butter.
From what I found with cooking them, I had the best results baking them in a smaller, 4 or 5″ pan using butter over medium heat. In this size pan I was able to get about 4 crepes out of 1/2 a cup of batter. I ended up on this baking method for 2 reasons:
- with the 4″ pan I had a more evenly baked crepe. With a larger pan the resulting crepes were slightly burnt of the outside and not totally done on the inside. Which goes to reason #2….
- with the 4″ pan I had a much easier time not breaking or ripping my crepe. With a larger pan I was only able to get one, non broken crepe out of 4, while I had a 4 for 4 success rate with the smaller pan.
Another useful tip: let you crepe batter sit 30 minutes before baking them, you'll end up with much better crepes.

Please be sure to check out all of our awesome bloggers and their recipes:

Adina ~ Gluten Free Travelette ~ Breakfast Crepes Three Ways
Caitlin ~ {Gluten-Free} Nom Nom Nom ~ Buckwheat Crepes
Caleigh ~ Gluten Free[k] ~ Banana Cinnamon Crepes
Claire ~ My Gluten Free Home ~ Victory Crepe Cake 
Ginger  ~ Fresh Ginger ~ Sweet 'n Savory
gretchen ~ kumquat ~ nutella crepe cake
Heather ~ Discovering the Extraordinary ~ "Southwestern" Crepes
Karen ~ Cooking Gluten-Free! ~ Gluten Free Crepes Savory or Sweet
Mary Fran ~ FrannyCakes ~ Gluten-free Peanut Butter Crepe Cake
Mary Fran ~ FrannyCakes ~ Gluten-Free Vanilla Bean Crêpes Sucrées
Morri  ~  Meals with Morri ~ Russian Blini for Two
Pete and Kelli ~ No Gluten, No Problem ~ Key Lime Crepes
Shauna ~ gluten-free girl ~ Gluten Free Buckwheat Crepes
T.R. ~ No One Likes Crumbley Cookies ~ Brownie Crepes with Strawberry Wine sauce
T.R. ~ No One Likes Crumbley Cookies ~ Basil Tomato and Feta Crepes
T.R. ~ No One Likes Crumbley Cookies ~ Fresh Fruit Crepe
Tara ~ A Baking Life ~ Breakfast Crepes with Eggs and Kale
Jonathan ~ The Canary Files ~ Vegan Crepes for Filipino Spring Rolls
Rachel ~ The Crispy Cook ~ Raspberries and Cream Crepes
~Mrs. R ~ Honey From Flinty Rocks ~ Crepes - Spinach & Dessert


Brownie Crepes with Strawberry Wine Sauce
Prep Time: 10 minutes
Inactive Prep Time: 30 minutes
Bake Time: 1 -2 minutes per crepe
Serves: 4 crepes

Ingredients:
Crepes
50g egg (~1 large egg)
50g milk
2 tsp vanilla
10g tapioca flour
15g potato starch

Sauce
10 sliced strawberries
3 tbsp white wine
1 tsp lemon juice

1-2 gluten free brownies, cubed
whipped cream

Steps
Whisk together the egg, milk, and vanilla until combined. Whisk in the flour and starch. Set aside for 30 minutes.

To make the sauce, in a small sauce pan, combine the berries, wine, and juice, and simmer over medium low heat for about 15-20 minutes, or until the berries are soft and the wine has become a vibrant red from the berries.

To make the crepes, heat a small saucepan over medium heat. Add about 1/2 tbsp of butter, and coat the inside of the pan. If there is any melted butter pooling in the pan, discard it before adding the batter, or else you're first crepe will end up greasy (believe me).

Add a small amount of batter ( several tablespoons ) of the pan, and swirl the pan around to coat the bottom of the pan with the batter. Let cook for 45 seconds to 1 minutes. Flip the crepe, and cook for another 30 seconds. 

Fill the crepe with brownies and strawberry sauce, and top with the whipped cream. Enjoy!

Sunday, February 19, 2012

0 Gluten Free Brownies


Servings 16 brownies
Prep Time 15 minutes
Bake Time 23 minutes


Ingredients
4 oz semisweet chocolate
1 stick butter
1 cup brown sugar
1.5 tsp vanilla
2 eggs
1/4 cup tapioca flour
1/2 cup potato starch
1/2 tsp xantham gum
1/4 tsp baking powder
1/2 cup semisweet chocolate chips
peanut butter and whipped cream for topping

Steps
Preheat the oven to 350F and grease a 8x8 or 9x9 square pan.

In  a small sauce pan, melt the 4oz chocolate and butter over low heat until fully melted. Stir in the sugar and vanilla until the sugar lumps have dissolved. To this whip in the eggs until well combined. Fold in the flours, gum, and powder until well combined. Do not over stir. Stir in the chocolate chips, and pour into the pan.

Bake for 23 minutes, or until inserted toothpick comes out clean. Cut and serve with peanut butter and whipped cream. Enjoy!

Sunday, February 12, 2012

7 Gluten Free Chocolate Cherry Cake


Hi everyone! I hope that you're having a wonderful weekend! To continue the theme of the month, #chocolatelove, here's a delicious recipe that's perfect for Valentine's Day this week. It's a tasty yellow cake filled with a chocolate cherry filling and frosted with a whipped chocolate frosting. For this cake I like to take the batter for a 9in round pan and make 4 smaller round cakes out of it. It's a great technique for making gluten free cakes that cook evenly and don't sink in the middle. I hope you enjoy this recipe!

The cake recipe is based on Ruhlman's Ratio for sponge cake, and the whipped chocolate frosting recipe is located here.


Servings 2 4"inch 2-layer cakes
Prep Time 30 minutes
Bake Time 25 minutes

Ingredients
Yellow Cake
4 eggs and 1 yolk, room temperature
8 oz sugar
2 tbsp lemon juice
2 tsp vanilla
2 tsp baking powder
3 oz white rice flour
3 oz potato starch
2 oz tapioca flour
2 sticks melted butter, room temperature

Cherry filling
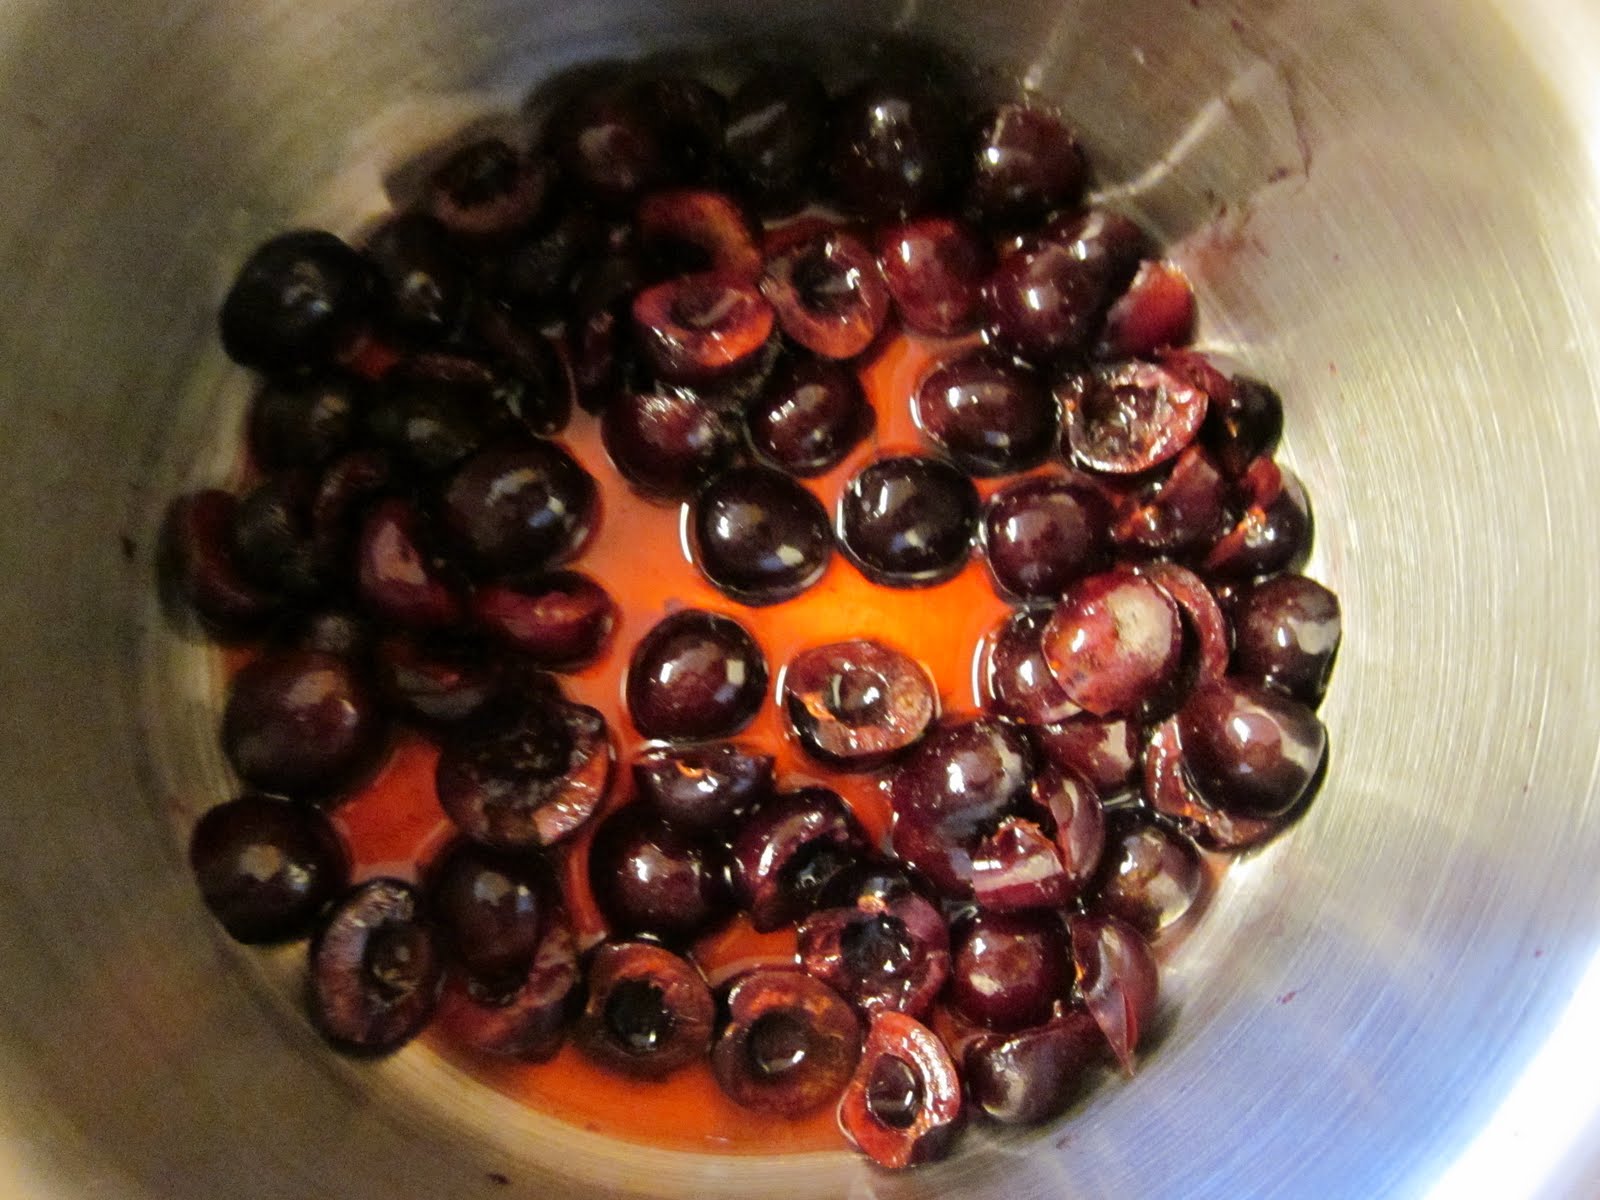
1/4 cup cherries, halved and pitted
1/4 cup white wine
2 tbsp lemon juice
3 tbsp sugar
1/2 cup of whipped chocolate frosting


Steps
Preheat the oven to 350F. Grease and dust either 1 9inch round cake pan or 4 small 4inch springform pans.

Combine the eggs, sugar, juice, and vanilla. Whisk for a few minutes until the eggs have tripled in volume. In a small bowl, combine the powder, flours, and starch. Fold the flour into the egg mix, 1/2 a cup at a time. Once combined, pour the butter into the batter and fold until combined. Pour the batter into the prepared pan(s). Bake for 20 minutes in the smaller pans (30 minutes if using a 9inch pan), or until a toothpick inserted comes out clean. Remove from the oven and let cool.
In a small sauce pan, combine the cherries, white wine, juice, and sugar. Cook over medium low heat, stirring occasionally. Cook the cherries for about 20 minutes, or until the flesh is soft and tender. Remove the sauce from the heat and let cool to room temperature.
Once cool, fold in the 1/2 cup of frosting. If using 1 9in pan, use a knife to separate the cake into 2 layers. To assemble the cake:
Place the bottom layer onto a plate. Place a sizable amount of the cherry filling onto the cake and spread. You want this layer to be between 1/4 to 1/2 an inch. 
Place another layer on top upside down, so that the flat bottom of the cake creates a smooth surface on the top. 
Finally frost and enjoy your cake! Keep in the refrigerator for up to 2-3 days to preserve freshness.