Showing posts with label Citrus. Show all posts

Thursday, May 30, 2013

0 Gluten Free Key Lime Desserts


Hey everyone! I've been on a bit of a vacation this week, so it is great to be back! Here's a gluten free dessert recipe that I adapted from a Betty Crocker recipe located here: http://www.bettycrocker.com/recipes/light-n-fluffy-key-lime-dessert-squares/980d08e4-69e5-43fe-ac58-8e0c323a3bdd .

There's a few things that I did to adapt the recipe to make it gluten free, and a bit more to my liking. I replaced the cookie crust with a gluten free graham cracker crust. If you can find it, I recommend using Schar gluten free graham style crackers. They have a great texture and taste. Another great thing is that it is also an egg and dairy free graham cracker (although this recipe is not dairy free).

Since this is a bit of a guilty pleasure dessert, I like to use a fat free condensed milk rather than normal condensed milk to make me feel slightly less guilty. I also use cupcake wrappers and tins to package the dessert. It makes single servings much easier to provide, and looks really great served on a platter.

Prep Time: 15 minutes
Inactive Prep Time:  2 hours
Servings: 1 dozen

Ingredients:
1 cup of gluten free graham cracker crumbs (I use Schar crackers, it takes about 2/3 of one box)
3 tbsp butter, melted
1/4 cup sugar
1 can fat free condensed milk
1/2 and 2 tbsp key lime juice
1 8oz container Cool Whip
1 6oz lemon flavored yogurt
zest of one lime
limes for garnish

Steps
Line 12 cupcake cups with cupcake liners. Set aside. In a medium bowl, mix the crumbs, butter, and sugar. Evenly distribute between the 12 cups and press down to form crusts. Set aside.

In a medium bowl, whisk the milk and juice together. Once combined, fold in the yogurt, zest, and half the container of Cool Whip. Distribute evenly between the cups, and refrigerate for 2 hours.

To serve, remove the cups from their liners, and top with a dollup of Cool Whip and a thinly sliced lime slice.

Monday, May 14, 2012

0 Gluten Free Orange Almond Cake

Thank you to Corelyn for the photo!
Hey everyone! So a little while ago, two of my good friends became engaged, and we had an engagement party this past weekend! They became engaged in Europe while eating dinner near a windmill, so I was inspired to make cakes in the shape of windmills for the party. All I needed to make was 3 main components:

  • the cake to create windmill towers
  • a fruit filling to put in between each layer
  • thin strips of brittle to form the windmill blades
I wanted to create a honey almond brittle, and flavors such as oranges and cherries go well with honey and almonds. 

The cake is a basic gluten free sponge cake infused with orange juice and zest. The fruit filling is macerated cherries that soaked in wine for half a day. Finally, the brittle is a simple brittle made with honey and almonds.
Toasted almonds! Yum!
I hope you enjoy this recipe, and congrats to Mary and Zak!

Almond Honey Brittle

Prep Time: 10 minutes
Cook Time: 10 minutes
Inactive Prep Time: 4 hours

Ingredients:
1/2 c blanched almonds
1/2 c granulated sugar
1/4 c honey
1/4 tbsp butter
1/4 c water

Steps:
Spread the almonds out onto a sheet, and toast for about 5 minutes. Chop the almonds. 
In a small saucepan, boil the sugar, honey, and water until mix hits 300F, stirring constantly. Once the mix hits 300F, remove from heat and stir in the butter and almonds. 

Spread the brittle onto a silicone mat, as thin as possible. After about 3 minutes, cut the brittle into thin strips for the rotor blades. Let them cool to room temperature, then store in the refrigerator until firm.


Gluten Free Orange Sponge Cake

Prep Time: 10 minutes
Bake Time: 30 minutes

Ingredients
4 eggs + 1 yolk
8 oz sugar
1 tsp salt
2 tbsp orange juice
zest of two oranges
2 tsp vanilla
2 tsp baking powder
3 oz sweet white rice flour
3 oz potato starch
2 oz tapioca flour
2 sticks melted butter

Steps
Preheat oven to 350F. Line a rectangle baking sheet with parchment paper.

In a medium bowl, whisk egg, sugar, salt, juice, zest, and vanilla for about 4 minutes.

Fold in the powder, starch, and flours. Once combined fold in the butter. 

Pour into the prepared pan, and bake for 30 minutes or until an inserted toothpick comes out clean.


Cherry Filling

Inactive Prep Time: 2 hours
Cook Time: 15 minutes

Ingredients
1 cup Rainer Cherries
1/4 cup white wine
2 tbsp honey

Steps

Pit the cherries and cut into quarters. Place all the ingredients into a small saucepan, and combine. Let sit for 2 hours. 

Over medium heat, cook the cherries for 15 minutes, stirring occasionally.

Blend the cherries into a jam with an immersion blender.

Assembly

cake
filling
brittle
2 cup whipped cream

Cut the cake into 2 inch squares. Group the cakes into groups of 3. Place the first layer onto a place, and then spoon filling onto first layer. Add a second layer and add another spoon of filling. Top with a third cake. Ice the cake with whipped cream, and cross two brittle strips in the shape of a windmill.

Saturday, January 7, 2012

29 Citruslove: Gluten Free Chocolate Orange Crème Brûlée

Hello everyone! I have participated in the love bloghop event for the past few months (for more information check out last month's #cookielove event). This month we're showing our love and adoration for citrus! Here's my contribution with Gluten Free Chocolate Orange Crème Brûlées.
I want these in my mouth. Right now. All of them.
Citrus is a magical food gift from the gods. Each species of citrus fruit has its own aroma, flavor, and acidity levels. I love using fresh citrus in both savory and sweet dishes to deliver acidity to a dish, and create amazing flavor combinations. My favorite sweet application is the beautiful marriage of chocolate and orange. Infinite Yums. That's where we come to this sinfully delicious crème brûlée. 
I made this dessert this past New Year's Eve for a party, and it may be my best decision of 2011. To say this recipe was a hit is an understatement. You know a dish is a success when you lose count of the number of times that people steal someone else's dessert just to get one more guilty bite. If there's anything you try to make on this blog, make this. Believe me, you won't regret it. 
NYE one of my friends referred to this as a culinary lightsaber. 
A crème brûlée translates to "burnt cream," and is a rich custard covered in a layer of hard, caramelized sugar. (Sounds delicious right?) After cracking through the hard caramel layer of this chocolate orange crème brûlée, what lies underneath is dessert utopia. Each spoonful delivers a smooth, rich bite of decadent dark chocolate infused with the sweet, tart essence of orange zest. The textural contrast is amazing, but nothing can compare to the rich creamy marriage of dark chocolate and vibrant orange. This here is food for your soul. 
Also, who doesn't love the opportunity to pull out the blow torch? I know I do...


For those who haven't heard of the terminology "tempering eggs" before, here's a short description vital to the success of the recipe. Eggs can be very temperamental when it comes to sudden changes in temperature. If you were to dump eggs into a warm or hot pot of chocolate, you'll end up with little bits of scrambled eggs in your chocolate mix rather than a smooth, creamy solution. You resolve this by slowly bringing the eggs to temperature. By adding small amounts of a warm liquid to eggs, you'll temper them, slowly bringing them to the same temperature as your liquid. Here's a Food Network video that illustrates (http://www.foodnetwork.com/videos/how-to-temper-eggs-video/85017.html). Note that in this recipe once we add the eggs to the liquid, the liquid will not be on the burner (unlike in the video where it stays over heat).

This month's #citruslove co-hosts:

Astig Vegan ~ Richgail
Oh Cake ~ Jessica ~ @jesshose

There's sure to be tons of culinary genius across all the blogs for this #citruslove event. Thank you to all the co-hosts and be sure to check out the recipe for Gluten Free Chocolate Orange  Crème Brûlées below the  bloghop.


Gluten Free Chocolate Orange Crème Brûlée

Servings: 8 4" ramekins
Prep Time: 20 minutes before baking, 5 minutes before serving
Bake Time: 35-40 minutes
Inactive Prep Time: 3 hours

Ingredients:
11 egg yolks
1 quart heavy whipping cream
1 cup granulated white sugar
1 tablespoon vanilla
2 oz unsweetened Ghirardelli cocoa powder
1 oz Ghirardelli 100% cacao unsweetened chocolate
zest of 2 navel oranges
granulated sugar for caramelization

Steps
In a large bowl, add the egg yolks. Whisk the egg yolks for about 30 seconds. Set the bowl aside.

Preheat the oven to 350F.

Add the whipping cream, sugar, and vanilla to a medium saucepan over medium heat. Stir constantly until the sugar has dissolved and the cream is warm.
Add the cocoa powder and chocolate to the pot. Stir until the chocolate has completely melted and the cocoa powder has completely dissolved. Remove from heat and let cool for a little bit. Once the chocolate is warm to the touch, but not hot, it is time to temper the eggs. Add about 1/4 cup of the chocolate to the egg yolks, whisking constantly. Once they are combined, add 1/2 cup of the chocolate to the eggs, whisking constantly. Once they are combined, add the rest of the chocolate to the eggs. Add the orange zest to the creme, and whisk until distributed throughout.
Pour the creme into the 8 ramekins. Place the ramekins into a rectangular pan that is about 2 inches high. Create a water bath for the ramekins that comes about halfway up the sides of the ramekins. Bake in a 350F oven for about 35-40 minutes, or until the cremes slightly jiggly when gently moved. Remove them from the oven, and immediately remove the ramekins from the water bath and let cool to room temperature completely. Refrigerate the cremes for 3 hours or until ready to serve.
How they appear out of the oven
Once you are ready to serve, remove the ramekins from the refrigerator. To caramelize the sugar, you have 1 of 2 options:

1. If you have a propane torch: Cover the tops of the cremes with sugar and caramelize with the propane torch until you no longer see white sugar crystals.
2. If you do not have a propane torch: Set your oven to broil. Cover the tops of the cremes with sugar. Place in the broiler and check every 10-30 seconds to make sure that the cremes do not burn. Remove them from the broiler immediately when the sugar has caramelized.

Wednesday, December 7, 2011

19 Ratio Rally - Cinnamon Lemon Cookies


Hey everyone, I hope you're having a good December so far, its time for the Gluten Free Ratio Rally again! This month our theme is cookies, and I am looking forward to seeing all the wonderful gluten free recipes! For the ratio rally, I wanted to make cookies that tasted like snickerdoodles with a twist. I added lemon zest to the recipe, and it really livens up the snickerdoodle cookies! They're really easy to make and tasty too!
As for the ratios, cookies are some of the most fun to experiment with changing the ratio. For example, the base ratio for a cookie is 1:2:3 sugar:fat:flour. My ratio is closer to being approximately 2:1:2 sugar:fat:flour, which is a comparable ratio to a drop cookie (ie chocolate chip cookies). The higher ratio of sugar creates a crispy texture on the outside of the cookies, while still tender inside. I hope you enjoy, and thank you to Caroline (click her to visit The G-Spot for her recipe) for hosting, here's all the awesome recipes from the rally!

Amanda | Gluten Free Maui | Simple Shortbread
Amie Valpone | The Healthy Apple | Grapefruit Sugar Cookies
Brooke | B & the boy! | Candy Cane Shortbread
Caleigh | Gluten Free[k] | Mulled Spice Cookies
Caneel | Mama Me Gluten Free | Cardamom Date Cookies
charissa | zest bakery | Coconut Peanut Butter Chocolate Chip Cookies
Caroline | The G-Spot | Double Chocolate Chip Peppermint Cookies
Claire | Gluten Freedom | Chai Latte Cashew Cookies
Erin | The Sensitive Epicure | Spritz Cookies with Jam
gretchen | kumquat | Classic Sugar Cookies
Irvin | Eat the Love | Apple Brown Butter Bay Leaf Spice Cookies
Jean | Gluten Free Doctor Recipes | Reindeer Cookies
Jenn | Jenn Cuisine | Basler Brunsli
Jonathan| The Canary Files | Vegan Salted Oatmeal Cherry Cookies
Karen | Cooking Gluten Free! | Mexican Wedding Cakes
Lisa from Gluten Free Canteen | Molasses Rum Raisin Cookies
Mary Fran | frannycakes | Pinwheel Cookies
Meaghan | The Wicked Good Vegan | Vegan Chocolate Chip Cookies
Meredith | Gluten Free Betty | Chocolate Peppermint Cookies
Morri | Meals With Morri| Stevia Sweetened & Grain-Free Thumbprint Cookies with Apricot Preserves
Pete & Kelli | No Gluten, No Problem| Belgian Speculaas Cookies
Rachel | The Crispy Cook | Melomakarona
Silvana Nardone | Silvana's Kitchen | Old-School Italian Jam-Filled Hazelnut Cookies
Tara | A Baking Life | Walnut Shortbread

Cinnamon Lemon Cookies


Servings 18 cookies
Prep Time 15 minutes
Bake Time 18 minutes

Ingredients
200 g sugar
113 g butter
1/2 tsp vanilla
1 egg
zest of 2 lemons
1 tsp baking powder
96 g white rice flour
32 g tapioca flour
64 g potato starch
1 tsp xantham gum
1 1/2 tsp cinnamon
cinnamon sugar (about 3 tbsp)

Steps
Preheat the oven to 350F. Grease two baking sheets.
In a small bowl, mix the flours, powder, gum, and cinnamon. In a medium bowl whip the sugar and butter until fluffy. Mix in the vanilla, egg, and zest. Stir in the flour mix, adding half a cup at a time, until fully combined and a dough forms.
By the tablespoons, drop the dough onto the sheets, separated by 1 inch around each cookie. Sprinkle each dough ball with cinnamon sugar, and bake for 18 minutes. Let the cookies cool for a bit before eating, and enjoy!

Monday, August 29, 2011

0 Gluten Free Key Lime Cupcakes


This past couple weeks have been quite daunting for me. I've been working quite a bit, so I sadly haven't had much chance to post recipes or cook. However, I have quite a few uber awesome recipes coming up, so I'm making up for it with high quality.

Now there are a lot of components to this dessert for sure, but all the hard work is worth the delicious pay off.

Here's a really zesty recipe that transforms key lime pie into a cake. It uses a gluten free graham cracker crust, homemade key lime curd, the cake recipe from my Tiramisu Cake, and a mascarpone cheese frosting. I hope you enjoy!

For the key lime curd, I use the following recipe from Allrecipes, "Fresh Lime Curd", and I substitute the lime juice with key lime juice. For this recipe, be sure to carefully temper your eggs, or else you'll end up with scrambled eggs in your curd.

Serves: 18 cupcakes
Prep Time: 35 minutes total

  • 5 minutes for the crust, 
  • 10 minutes for the cake, 
  • 10 minutes for the curd, 
  • 10 minutes for the frosting
Cook Time: 25 minutes for the cake, 30 minutes for the curd

Ingredients:
Crust
1 1/2 cup gluten free graham cracker crumbs
6 tbsp butter
1/4 cup sugar

Cake
227g eggs (4-5 large eggs)
227g white sugar
1 tsp lemon juice
2 tsp vanilla extract
2 tsp baking powder
85g white rice flour
57g potato starch
28g tapioca starch
28g almond flour
28g brown rice flour
227g melted butter


Frosting
5 egg yolks
1 cup sugar
1 cup mascarpone
1 1/2 cup heavy cream


Steps
Preheat the oven to 350F.


Prepare the Allrecipes version of Fresh Lime Curd. Click here for the link. Like I said before, be sure to replace the lime juice with the key lime juice, and be sure to carefully temper your eggs. At first the curd will look like this:
At the end after cooking, the curd will go from a grey-tan color to a bold golden green:


Refrigerate the curd while preparing the rest of the components. 


Crust
Line cupcake tins with paper cups. In a small bowl, melt all the butter. Combine the crust ingredients, and then spoon crust into the bottom of each cup. Spread the crust into even layers.


Cake
In a small bowl, combine all the flours.

Fill a shallow dish with warm water, and place an empty medium-sized mixing bowl into the dish. Add the eggs, sugar, lemon, and vanilla, beat for about a minute. Remove the eggs from the water and beat them until they have tripled in volume, which took me about 5 minutes.

Gradually fold the flour into the batter until fully combined. Pour the batter into the cupcake tines, and bake for 25 minutes, or until an inserted toothpick comes out clean.


Place the cupcakes onto a cooling rack and let them cool completely.


Frosting


To make the frosting, start a double boiler, and add the egg yolks and sugar. Cook over high heat until the sugar is dissolved, stirring constantly. Once sugar has dissolved, reduce to low heat and continuously whisk for 10 minutes. After the 10 minutes, remove the custard from the heat and whisk until it has thickened a bit, approximately 1 minute. Fold in the mascarpone until combined. Whip the cream in a chilled bowl until peaks form, and gently fold into the custard until well combined. Refrigerate the frosting until you are ready to frost.


Assembly


Using a circular piping tip, or a knife, cut holes into the middles of the cakes. 


Fill a Ziploc bag with the curd, and then cut off the tip to form a piping bag. Pipe the middle of the cakes with the curd.


Then frost the top of each cupcake with the frosting. Top the cupcakes with lime zest for garnish.


I hope you enjoy this recipe! Hope everyone has a good week!

Saturday, July 23, 2011

0 Dark Chocolate Lemon Tart


This a really quick and easy dessert to make that blends the acidity of citrus with the richness of dark chocolate. In my first trial I used only chocolate and corn syrup for the chocolate swirl, but in the end all it left was hard crunchy chocolate throughout the pie. This recipe is the second trial, which uses a simple chocolate ganache. I hope you enjoy!


I hope you enjoy is beautiful yet easy to make dessert!

Serves: 8
Active Prep Time: 10 minutes
Inactive Prep Time: 1 hour

Crust Ingredients:
3/4 cup gluten free graham cracker crumbs
1/8 cup sugar
3 tbsp melted butter

Tart Ingredients:
2 cups prepared lemon curd (or use your favorite recipe)
3 oz dark chocolate
1/3 cup heavy cream

Steps:
1. In a small bowl, mix all of the crust ingredients together, and then spread them evenly into a pie tin.
2. In a small saucepan, heat the chocolate and cream over medium heat until the chocolate is melted and a smooth, consistent ganache has formed. Set aside and let chill for 5 minutes.
3. Pour the lemon curd into the pie crust, and place spoonfuls of chocolate onto the top of the tart. Using a toothpick, swirl the chocolate through the lemon until a swirl has formed. Refrigerate for an hour before serving.

Sunday, April 3, 2011

0 GF Almond Lemon Pound Cake with Raspberry Balsamic Sauce


Hey! I hope everyone had a good weekend! This weekend I decided to experiment with a flour that I haven't dealt with before, almond flour.

Almond flour consists of ground up blanched almonds, and is rather popular in the world of gluten free, judging from blogs and such I've searched through. One of my friends on Twitter, @GlutenFreeFinds, referred me to Elana's Pantry, a gluten free blogger who's written several cookbooks on using almond flour. In summary, almond flour is high in protein and healthy fats, and is low in carbohydrates. The major con that kept me from trying almond flour all this time is the price: its the most expensive gluten free flour I've come across, at ~$15 per pound. Yikes. But if you want to risk the cost for the taste of it, please go to Elana's Pantry to learn everything you'd want to know about almond flour. It's a fantastic resource. The one thing I've learned is that Bob's Red Mill almond flour is not the best out there. Elana mentions it on her blog, and I back her up on it, the texture while cooking comes out overly wet, and takes longer to bake. Once again, go to her blog for more suggestions on where to get the best almond flour, and for a lesser cost than $15 per pound.

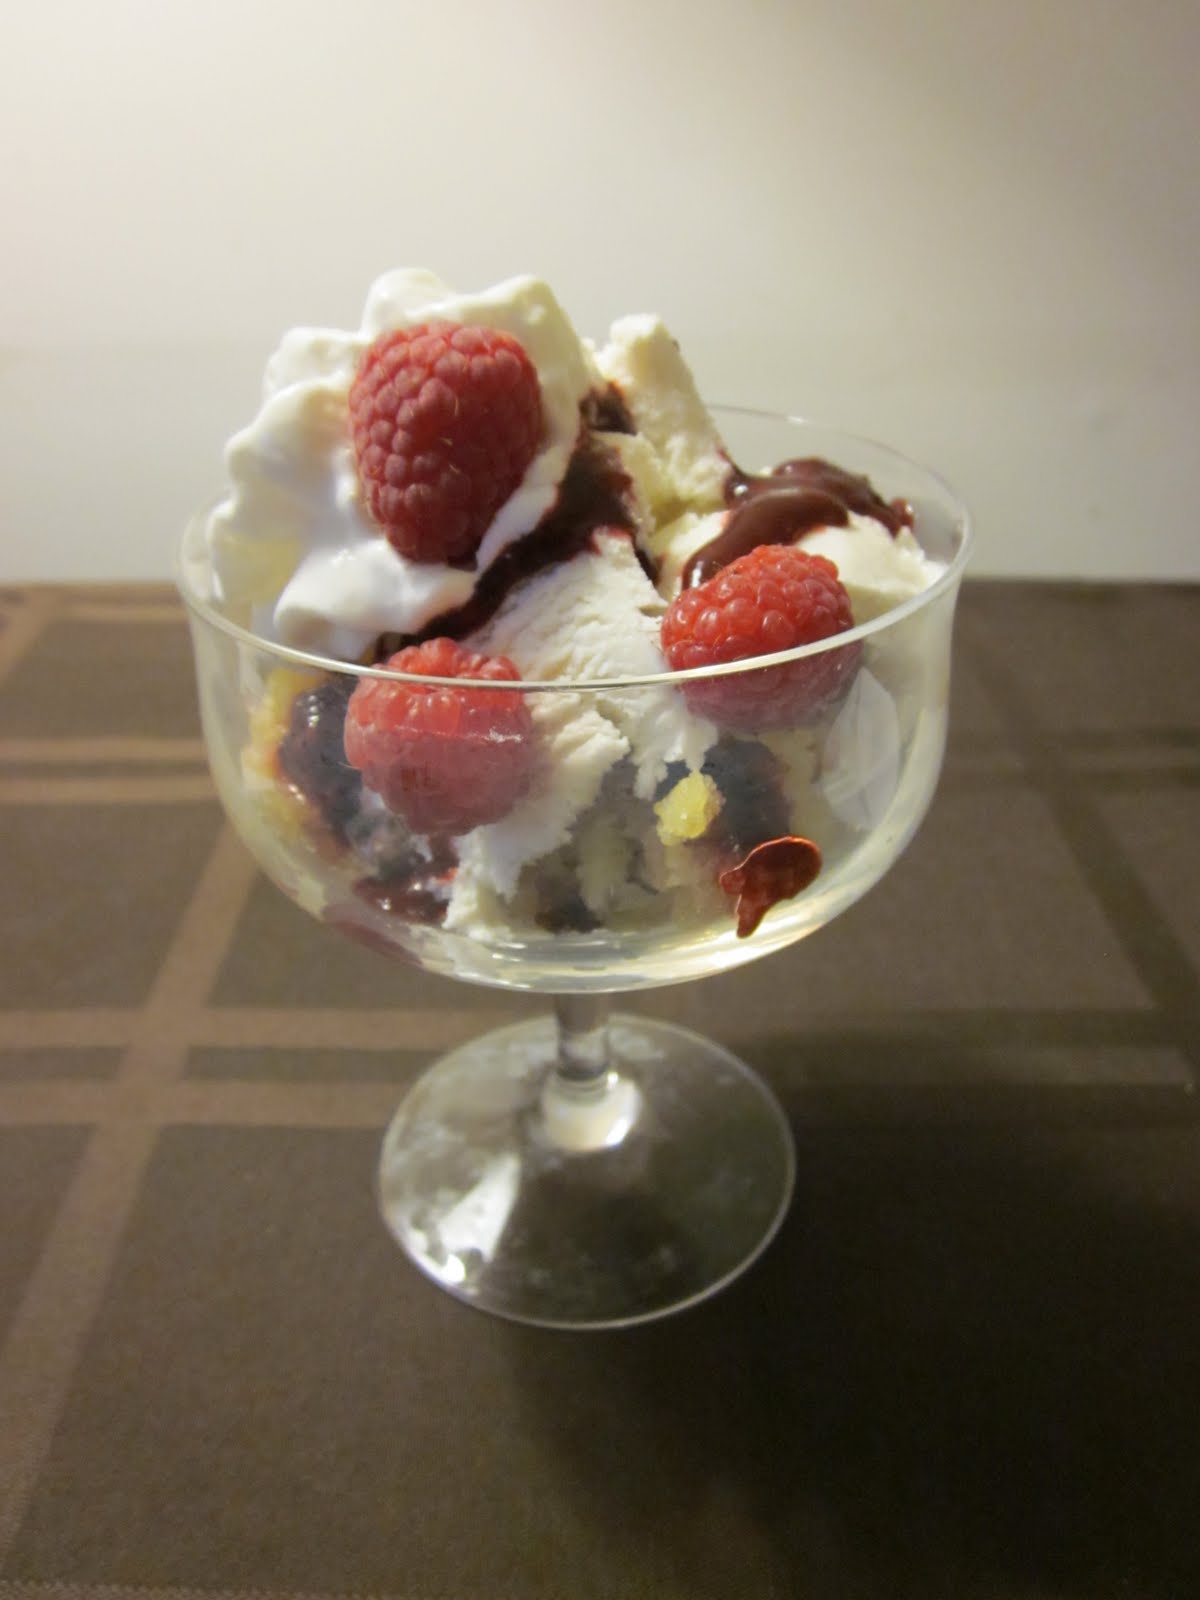
Along with trying a new flour in baking gluten free desserts, I wanted to make a cake with a fresh citrus flavor to celebrate the coming of spring (I don't know about others, but I've always associated the freshness of citrus with spring). In the recipe I include how to make a raspberry balsamic sauce that I like to pair with the cake. It provides a good counterbalance to the sweetness of the cake and ice cream (if you decide to serve it with ice cream, which I wholly recommend).

Also, I would like to mention ICCK's gluten free pound cake, as this cake recipe is a variation of that one.

Prep Time: 15 minutes
Bake Time: 1-1.5 hours

Cake Ingredients:

  • 3/4 cup + 2 tbsp butter, room temperature, cubed
  • 1 1/2 cup sugar
  • 5 eggs
  • 1 tbsp vanilla extract
  • zest and juice of 2 lemons
  • 2 cups almond flour
  • 2 tsp baking powder
  • 1 tsp salt
  • Raspberry-Balsamic sauce (optional, recipe below)
Steps:
1. Preheat the oven to 325F, and grease and flour (with almond flour) the inside of a bundt pan.
2. In a medium bowl, beat the butter until fluffy. Beat the sugar in by the half cup until creamy.
3. Beat in each egg one at a time. After the last egg, beat in the vanilla and lemon zest and juice.
4. In a small bowl, mix the flour, powder, and salt. Slowly beat the flour into the wet mix by the half cup.
5. Pour the batter into the prepared bundt pan, and place in the oven for at least an hour. Once the edges brown and a toothpick comes out clean and dry, remove the cake from the oven and let it rest for 10 minutes before removing from the pan.
6. Slice and serve with ice cream (optional) and sauce (also optional, recipe follows).


Raspberry-Balsamic sauce


Ingredients:

  • 4 oz of raspberries
  • 1 tbsp balsamic vinegar
  • 1/2 tsp honey
  • 1/2 tsp vanilla extract
  • zest of one lemon
  • dash of pepper


Steps:
1. Preheat a small pan on low heat. Cut 3oz of the raspberries in half, and cook until berries have loosened, and become jam-like.
2. Press the jam through a fine strainer or cheesecloth to remove the seeds, and return to the pan.
3. Add all other ingredients, and increase heat to medium low. Cook the sauce for about 5 minutes. Cool and serve with the cake.

Thursday, March 31, 2011

0 Gluten Free Lemon and Arugula Chicken Pasta


With spring (eventually) coming, I wanted to post a dinner recipe that was relatively healthy and light. I use butter in this recipe, but it can always be substituted with olive oil or margarine. I like adding arugula to the pasta for the color, and for the taste that it adds to the pasta.

This recipe is a good one to make after a long day of work because it can take under 30 minutes if you use leftover or store-bought chicken (I like to buy the rotisserie chicken for these kind of quick recipes). I hope you enjoy!

Cook time: 30 minutes
Servings: 1-2


Ingredients
6 oz penne rice pasta
1 lemon, juiced
2 cloves garlic, minced
1 tbsp olive oil
1 tbsp butter
1 tsp oregano
1 tsp basil
1 handful baby arugula, plus a few leaves for garnish
Breast of one chicken

Steps:
1. Boil water for the pasta, then add the pasta and let boil for 1 to 2 minutes. Cover and remove from heat, let cook for about 18 minutes.
2. While the pasta cooks, shred the chicken mean by hand.
3. In a small saucepan over medium, add the oil and butter. Once the butter has melted, add the garlic and sautee for a few minutes.
4. Remove the oil from the heat, then add the herbs and the arugula to the oil so that it wilts. Once the pasta is done, drain and add to the oil. Toss the pasta and oil with the chicken and lemon juice, and salt and pepper to taste.
5. Tightly roll 2 arugula leaves, and slice into shreds to garnish the pasta.

Saturday, March 26, 2011

0 Gluten Free Orange Blackberry Chicken with Mixed Rice


This past weekend I went wine tasting around the Charlottesville area. One of the wineries I went to was Hill Top Berry Farm and Winery. Hill Top is one of my favorite wineries in Virginia because of their atmosphere (a true family owned winery that makes you feel like a member of the family), interesting range of flavors, and spectacular mead. All of their wines and meads are "True to the Fruit", which to me means that each of their wines and meads capture the flavor and essence of a particular berry. They also bottle several varieties of mead, and each sip of their mead is like a taste of heaven. Seriously.
When I last tasted at Hill Top, they described how each wine or mead could be paired with a meal, or how you could cook with them. One that stuck out to me was the Blackberry Delight Wine, which pairs wonderfully with chocolate. They described one recipe, which involved substituting water in brownie mix with the wine. This inspired me to come up with a meal centered around this wine that consisted of a savory dish and a dessert dish. 

The blackberry wine has a distinct sweetness to it, combined with the tartness that you would expect from eating a blackberry. I thought this would pair wonderfully with the acidity and sweetness of oranges, and decided to use chicken because I love the combination of citrus and chicken. The result is a sweet yet tangy chicken with a little bit of a kick from the ginger. I hope you enjoy!

Servings: Dinner for two
Cooking Time: 40 minutes

Ingredients: 
  • 2 Chicken Breasts, butterflied
  • 2 tsp minced garlic
  • Juice of 2 cara cara oranges (~1/3 cup orange juice)
  • 1 tsp grated fresh ginger
  • 2 tsp lemon juice
  • 2 tbsp butter
  • 3 tbsp Hill Top Blackberry Delight Wine (substitute with another Blackberry Wine...if you have to...)
  • salt and pepper
  • Reese Brown and Wild Rice

Steps:
1. Preheat oven to 375F. Place the chicken onto a baking sheet lined with aluminum foil, and season with salt and pepper. Bake the chicken for approximately 20 minutes.
2. While the oven is preheating and the the chicken is cooking, boil the recommended amount of water for the rice, and add a tablespoon of butter. Once boiling, add rice, cover, and simmer at medium heat for the recommended amount of time on the rice container.
Cara Cara Oranges are pink like grapefruit, and milder than traditional navel oranges.
3. In a small bowl, stir the juices, ginger, and wine.
4. Preheat a small saucepan on medium heat. Add the butter and garlic, and sautee for a minute to two. Pour the juice mix into the pan and stir occasionally. Reduce the juice into a sauce, which will take about  10 minutes. Season with a dash of salt and pepper.You want a color that is darker than it was originally (due to caramelized sugary goodness), but a texture that is still liquid and not thick like a syrup. Easiest way to remember is that a sauce is liquidy, while glaze (such as teriyaki or barbeque) is thick and sticky. 

5. After the chicken has been cooking for about 20 minutes, drizzle some of the sauce onto the chicken, and bake for another 5-10 minutes depending on thickness until there is no more pink in the chicken. Remove from the oven and let sit for 5 minutes.
6. Once all components are done, fluff the rice onto a plate. Slice the chicken and fan on top of the rice. Then drizzle the orange blackberry sauce on top of the chicken and rice. Serve with the blackberry wine, chilled. 


I hope you enjoy this meal, and I fully recommend anyone living in the Virginia area to go try the wines at Hill Top Winery, you'll really enjoy the experience. For those outside of Virginia, call the winery and see if they deliver to where you live. 

Tuesday, February 22, 2011

1 Key Lime Pie Ice Cream


Even though it snowed this morning in Virginia, this past weekend we had some amazing 70 degree weather. Because of that, I made some key lime pie ice cream for my roommates to celebrate the ever close coming of warm weather. I adapted this from the key lime pie recipe off the back of a key lime pie juice bottle, replacing the egg with milk and cream. I hope you enjoy!

Ingredients
1/2 cup plus 2 tbsp key lime juice
14 oz can condensed milk
1/2 cup heavy cream
1 1/2 cup whole milk
1/4 cup gluten free graham cracker crumbs

Steps
1. In a bowl combine all ingredients except the crumbs. Pour into an ice cream maker.
2. After about 15 minutes, pour in the crumbs. Let the ice cream continue for another 15 minutes.
3. Server with additional crumbs and fresh whipped cream.